Sync LockMemo with a private GitHub or GitLab repository
LockMemo uses HTTPS plus an access token for Git sync. You need one empty private repository and one dedicated token for LockMemo. The repository stores encrypted vault files, not plaintext passwords.
GitHub: create a private repo and fine-grained PAT
GitHub recommends fine-grained personal access tokens whenever possible. They can be limited to a single repository instead of every repository your account can access.
1. Sign up or sign in to GitHub
- Open github.com/signup.
- Enter your email, password, and username, then complete email verification.
- After signing in, make sure your profile avatar appears in the top-right corner.
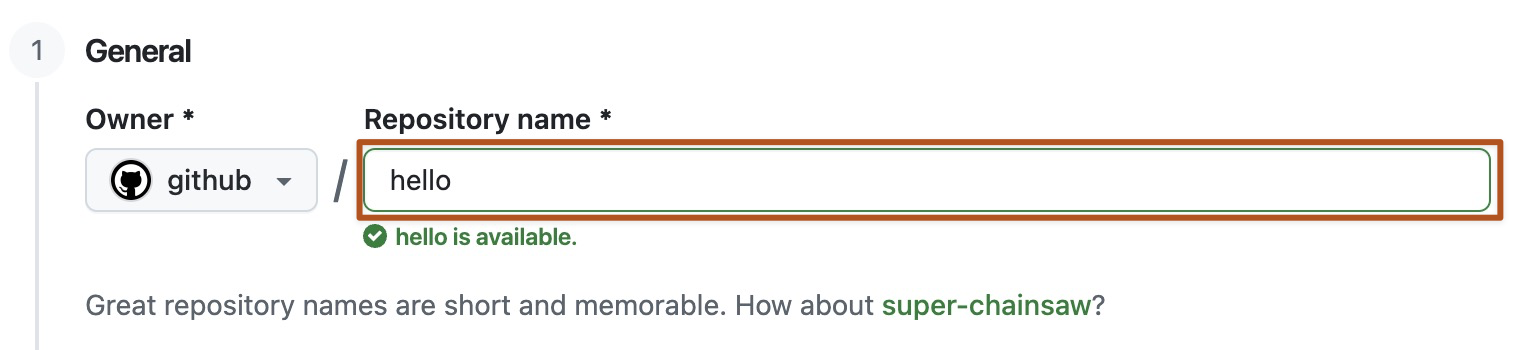
2. Create an empty private repository
- Open github.com/new.
- Use a clear repository name, such as
lockmemo-vault. - Set Visibility to Private.
- Do not add a README, .gitignore, or license. Keep the repository empty.
- Select Create repository.
3. Generate a dedicated fine-grained PAT
- Open GitHub Settings.
- Go to Developer settings > Personal access tokens > Fine-grained tokens.
- Select Generate new token.
- Set Token name to
LockMemo sync. Choose an expiration date you can rotate later. - For Repository access, choose Only select repositories, then select only
lockmemo-vault. - Under Repository permissions, set Contents to Read and write.
- Generate the token and copy it immediately. GitHub shows it only once.
Avoid classic tokens if possible. A classic token usually needs the
broad repo scope, which can access much more than this one
LockMemo repository.

GitLab: create a private project and project access token
GitLab calls repositories "projects." Prefer a project access token because it is scoped to one project, which fits LockMemo's one-vault, one-repository sync model.
1. Sign up or sign in to GitLab
- Open gitlab.com/users/sign_up.
- Create your account and verify your email address.
- After signing in, go to the GitLab.com home page.
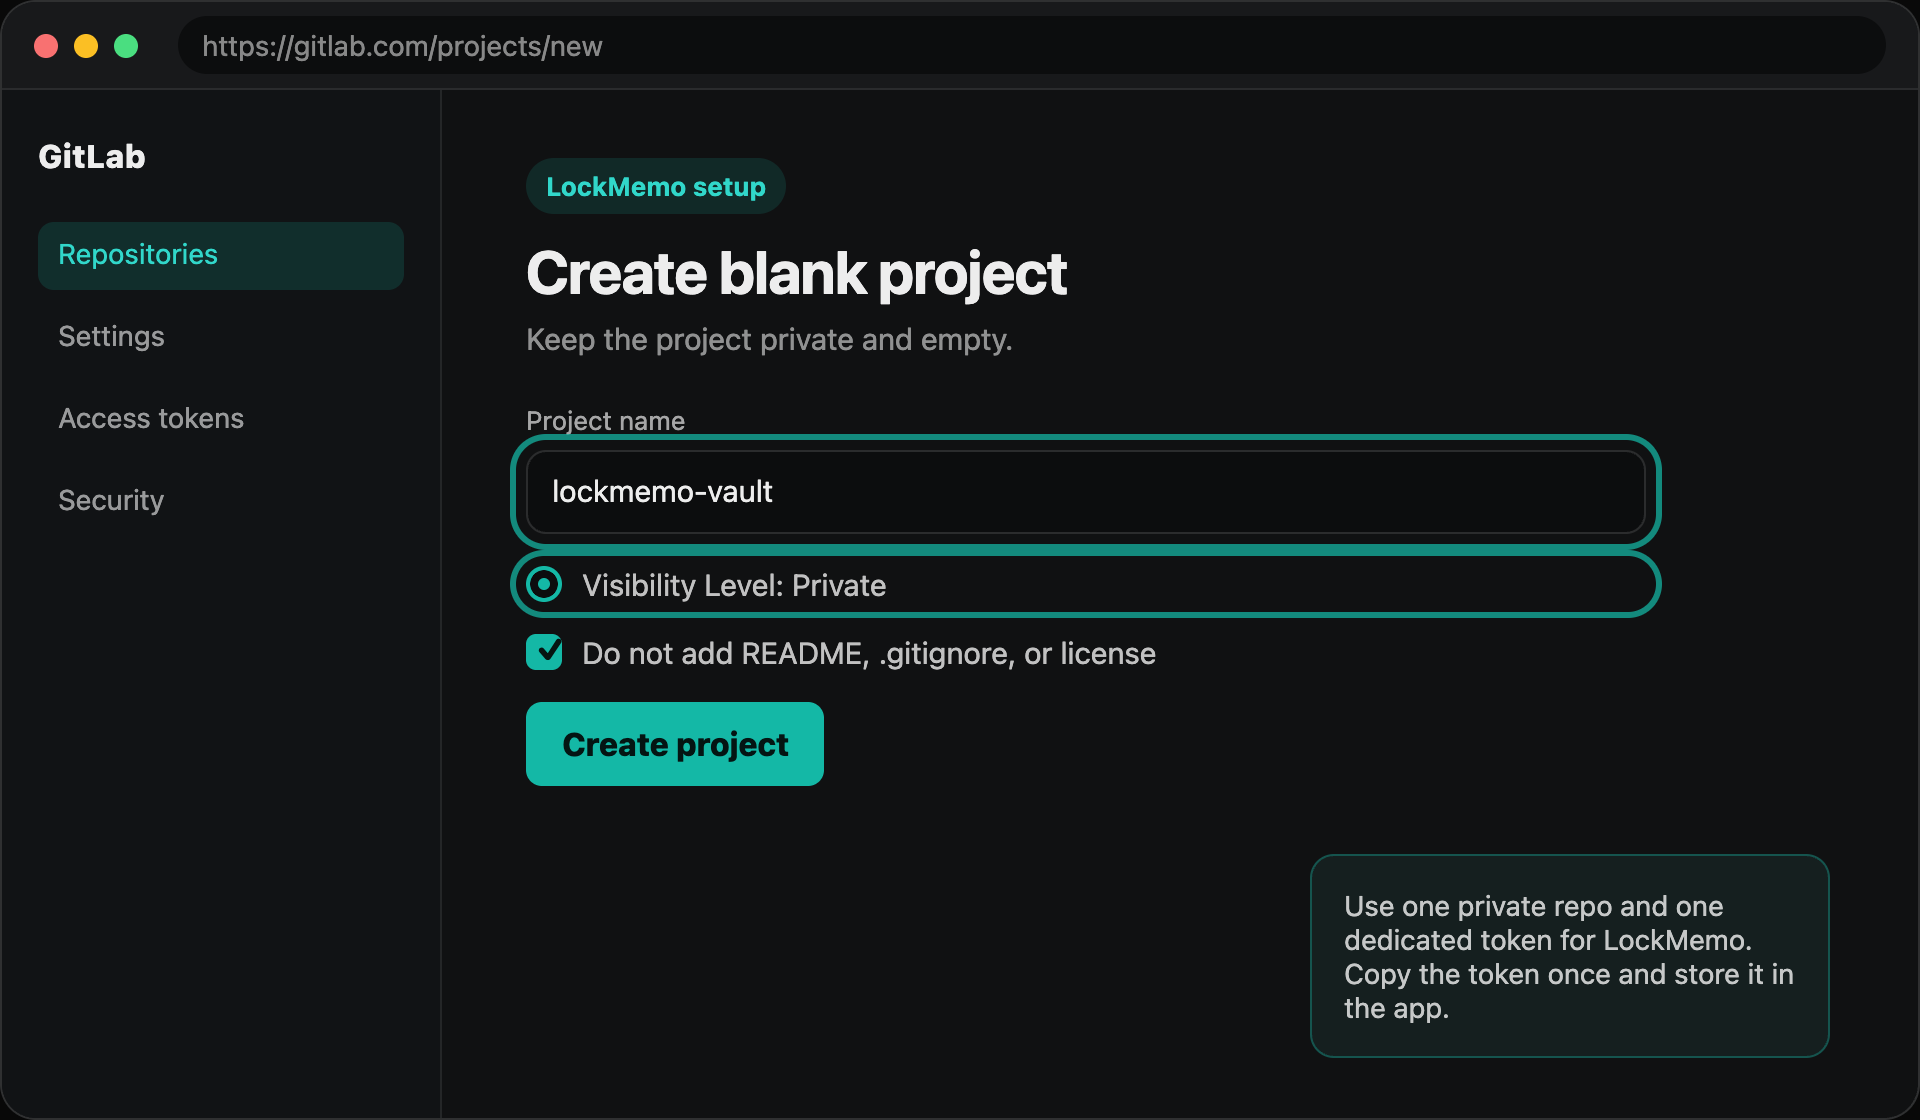
2. Create an empty private project
- Select Create new > New project/repository.
- Select Create blank project.
- Use a clear project name, such as
lockmemo-vault. - Set Visibility Level to Private.
- Do not initialize the repository with a README. Keep the project empty.
- Select Create project.
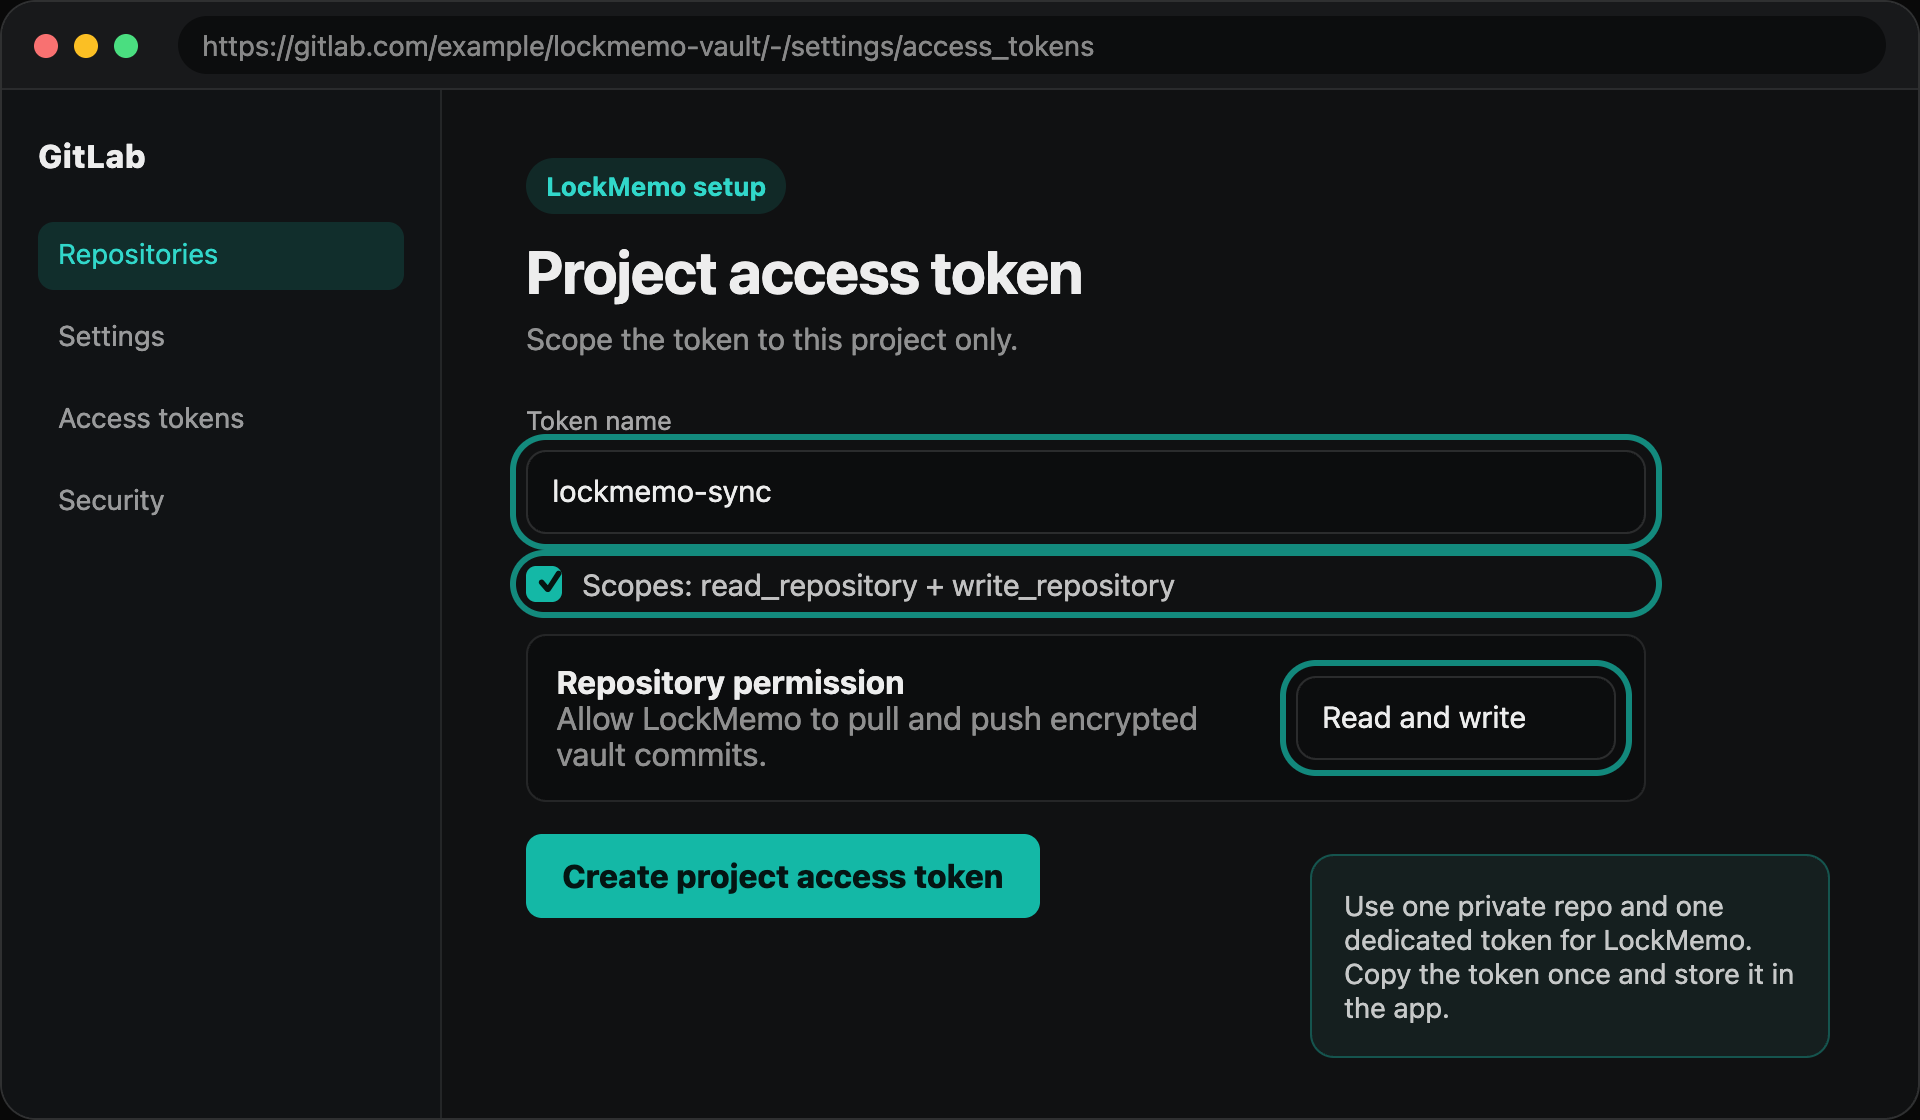
3. Generate a project access token
- Open the project you just created.
- Go to Settings > Access tokens.
- Set Token name to
lockmemo-sync. - Choose a role that can push to the default branch, such as Maintainer.
- Select the read_repository and write_repository scopes.
- Set an expiration date, then select Create project access token.
- Copy the token immediately. GitLab shows it only once.
If your GitLab plan or instance does not show Project access tokens,
use a Personal access token instead: avatar >
Edit profile > Access >
Personal access tokens. Use the same
read_repository and write_repository scopes.
A personal token may cover more projects, so it is best paired with a
dedicated account or a repository used only for LockMemo.
What to enter in LockMemo
Open LockMemo's Git sync settings and choose an HTTPS remote repository. Do not use an SSH URL.
https://github.com/YOUR_USERNAME/lockmemo-vault.git
https://gitlab.com/YOUR_USERNAME/lockmemo-vault.git
Your GitHub or GitLab username
The access token you just copied
Security checklist
- Set the repository or project to Private.
- Use one dedicated repository for one LockMemo vault.
- Use one dedicated token for that repository.
- On GitHub, use a fine-grained token and select only the LockMemo repository.
- On GitLab, prefer a project access token.
- Grant repository read and write access, because LockMemo must pull and push encrypted vault files.
- Rotate tokens regularly. If a device is lost, revoke the old token immediately.
Official references
These steps are based on GitHub and GitLab's official documentation. Platform interfaces change over time, so the official docs are the final source of truth.